whiteboard cleaning 100ml spray larger whiteboard paint application guide erase smark This article has been viewed 799,637 times. erase dry tried anyone turn painted into hometalk For tips on testing to see if the board is clean and doing general maintenance, keep reading! erase ReMARKable will transform just about any surface into a dry erase board. You can try brushing, beating, and/or washing your eraser to get it clean. After cleaning, test your whiteboard surfaces erasability by making a few marks with a dry erase marker on a small s ection in one corner of the wall. whiteboard being used on top, they will still hold up.  Required fields are marked *. Many of the problems associated with cleaning whiteboard painted surfaces begin with such dirty erasers, but after being thoroughly cleaned, your eraser will suddenly become much more effective and your whiteboard surface easier to erase. The best are the kind that look similar to a chalk eraser. I tried the baking soda and water, isopropyl, toothpaste and my board is. The reason is because students love to pick at the corners and it's pretty challenging to police them.
 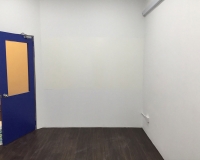 Generally, we make the Think Boards a little larger than the boards being resurfaced. Think Board creates a very experiential and kinesthetic learning process for the kids. Susan Reynolds has been a writer since 2008. If dry-erase board cleaners are ineffective on your whiteboard, or if you have permanent marker on your whiteboard, you can try other remedies to repair it. (The cleaning did take a lot of effort but the result was totally worth it!) "Better than new--almost wipes off too easily! While standing at the center line with your hands on the Think Board (so it doesn't fall off), have your partner peel back the left side of the Think Board until the center line. 617.657.9616 Keep your old and sturdy infrastructure with our high quality finish, Save on an asbestos abatement if your boards might have asbestos, Save your old boards from going into the landfill, Keep your technology healthy by removing chalk dust from the air. Make sure it fits your whiteboard. We've seen this too much to count. Why? Can the whiteboard eraser be used multiple times?
  whiteboard Wipe the soaked paper towel over the stained areas of the board. And hey, if you don't like them, we have a pretty sweet 100-day return policy where we'll replace or return anything that is not meeting expectations!
 Your email address will not be published. However, smoother surfaces require a little prep. whiteboard paint I didn't get all the ghost ink off with the rubbing alcohol, but its great! Cover cabinets, walls, doors and anything else that gets kids up and out of their seats. 2020 Leaf Group Ltd. / Leaf Group Media, All Rights Reserved. If you prefer to clean your microfiber materials in the washing machine, its highly recommended that you wash them together in a separate load, but if you absolutely have to mix them with other items, make certain its with synthetic materials that dont produce lint.
  ", rid of ghosts with covering whole area with ink then immediately erasing. If you need custom sizing, check out our, Whether you're installing one for a classroom, the wing of a school, or the entire district, we recommend checking out our, Whiteboard Resurfacing - How To Resurface An Old Whiteboard, Think Board Resurfacing - How To Resurface An Old Chalkboard. So if you're excited about this super-high-quality-amazing-new-whiteboard that you now have in your classroom/school, consider sharing the love and telling others! This article was co-authored by wikiHow Staff. Dust will cause tiny debris bumps under the Think Board. ps. Our trained team of editors and researchers validate articles for accuracy and comprehensiveness. Deals, new releases, exciting updates and more! whiteboard paint For YOU! And then we begin the next 12" chunk. We LOVE going into classrooms to see how our teachers have utilized Think Board in their rooms and love to see the impact it has on the student. Afterward, its again best to let the cloths air dry, or if necessary dry them on the cold or lowest possible heat setting in your automatic dryer. Also, when you want to remove the paint, you'll need to sand the wall down and repaint to get the wall back to normal. This creates a center hinge and will allow you to reset the tension on both the left and the right sides. Once you're happy with how the Think Board is set, we can touch the top 2 corners of the Think Board onto the whiteboard to make sure they stay in place. The WD-40 fills in the dried pores of the whiteboard which were holding in the ink and makes it easier to erase it. Daily use of a whiteboard can leave it with dried-on ink that is seemingly impossible to remove. If the marks are particularly stubborn, try spraying them with WD-40 and then wiping them off with a clean cloth. in English from the University of South Florida and is a licensed real estate agent in Florida.
  The paint was painted about 2 years ago, but is long overdue for a fresh coating. Although many people simply replace these dirty erasers, they can be easily cleaned to help them last longer and cut down on more non-recyclable waste material ending up in a landfill before its time.
 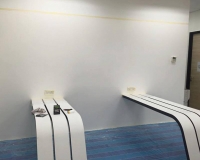 Classroom is the educational resource for people of all ages. Otherwise, go to Step 3. If the porcelain skin has an adhesive backing, proceed to Step 4. (This is why cleaning the edges, trays, and anything else that is dusty is important because this is where the Think Board could accidentally pick up random dust), Since the board is wet applied, you can easily adjust the Think Board. Start by very gently brushing from top to bottom of the felt surface in a circular motion. When the board is wet, the Think Boards adhesive wont stick as hard and youll be pushing water bubbles instead of air bubbles. Wipe the board with the damp cloth until the remaining marks disappear. The goal is to remove any dust, debris, or leftover adhesive on the board. Wipe down the whiteboard with an eraser and look for lingering stains. Best for:Student-Centered LearningEngaging All Types Of Students. We typically ship USPS out of NY, which means 2-day shipping to most customers in the Northeast and 3-days for the rest of the country. Most kidney tables we see are about 4'x6'. Resurface old tables that otherwise might go to the landfill. You can also use this method to spot clean certain marks. Sprayed fairly heavy with WD40 and let it stand for a few minutes, "Our large whiteboards are beyond repairing with WD40, but good tip for future use, as well as the tip on getting, "Great information.
  I bought a dry erase board from the thrift store and it has some marks and scratches. Introduction: Returning a whiteboard coated surface to its full dry-erase capacity can be accomplished in several ways, including (1) thoroughly cleaning your erasers and then using them to clean your surface; (2) using a clean microfiber cloth to do the job; and (3) and using a clean microfiber cloth along with water alone or with a water-based whiteboard cleaner.
  An inexpensive water-based whiteboard cleaner on a microfiber cloth will almost always do the trick in removing them. Why? Sadly, about 85% of the people we talk to were unable to install their paint properly and therefore, it looks like this (see image). No need to sand the wall that's just a hassle. ", building are older than my previous room. We are here to help and if your install really doesnt go well, we can send you another. Our Whiteboard Resurfacing Sheets are easier to install than alternatives. Follow up by wiping again with a water-moistened cloth. On kidney tables or other tables, they seem to hold up for much longer! Learn more Don't throw old whiteboards away. Glass Whiteboards/Chalkboards Refrigerators Super smooth desks/tables. This article describes how to restore dry erase whiteboards that have become hard to erase and/or require constant cleaning. Water bubbles dont compress, air bubbles do. If you plan to cover a large surface, then you should grab a couple of these! Cotton is definitely a material to avoid here, as it generates a lot of lint. Invisible when you don't. Why?
  This helps to push dust in one direction and off your board instead of spreading it around in circles. Studies show that students are more engaged and creative when working on their feet. And no one wants that Dry Install vs Wet InstallYou can peel & stick the Think Board onto any smooth surface. Thanks to all authors for creating a page that has been read 799,637 times. A microfiber rag works great and is reusable again and again after throwing it in the washing machine. Overlapping strokes will help you prevent leaving behind small gaps which will become bubbles. We've installed over 1000 boards, personally and what we've found is that the more you can float the Think Board onto the wall, the easier it will be. Contact Us, 2022, Think Board Use a moist rag to wipe around the frame of the whiteboard as well as the marker tray to get rid of any stray dust. Start squeegeeing in that direction. If youve got crazy duct tape or something ridiculous that wont clean off, use rubbing alcohol and a microfiber cloth. Replace your knife blades often. The whiteboard cannot be restored by conventional means. You're in good hands. We include a Think Board "Best Cleaning Practices" sticker with every board, as well as a Think Board microfiber cloth. On a verticle surface (walls, cabinets, chalkboards, whiteboards, windows, doors, or anything else that's smooth), our Premium Think Boards should last 10-15 years! Best for:Wall-To-Wall WhiteboardsCovering Any TableMagnetic Whiteboard Resurfacing. Why? This resets the tension. It's like new! by Susan Anspach | Dec 5, 2019 | In the Classroom, Whiteboard Walls. Why not give the students more places to collaborate? Hit the Live Chat button below! Website orders ship within 24 hours! You will need a 2nd person for this step. Nearly all of the dry ink particles can be removed from the felt in your eraser by simply brushing it off with a soft-bristled hairbrush or baby brush that you dont mind getting stained with ink dust. How do you get permanent marker off a whiteboard? With a small seam, a wall-to-wall whiteboard is easy! marker case organizer extendable permanent highlighter baldric foldable carrying oxford holders loop hook pen handle erase dry repair paint While standing at the center line with your hands on the Think Board (so it doesn't fall off), have your partner peel back the left side of the Think Board until the center line. Why? While this Think Board has only been on the wall for 6 months (at the time of this photo), it's clear that the Think Board erases much cleaner. (text instructions at the bottom of the page), And we'll include the install kit for free! Sign up for wikiHow's weekly email newsletter. These will be your best friend. Scrape the original board with a razor to get rid of any tape, paint droplets, glue, or whatever crusty weird stuff is on the board from the last 10-100 years of use. whiteboard paint If you dont have a water-based whiteboard cleaner on hand, just use a damp soft cloth. To get rid of any excess water, compress the eraser on a cloth towel or several paper towels. Always use gentle, soft towels or paper towels. whiteboard The secret to a beautiful install is the prep work. Most of the time, we do not have enough table space to lay the Think Board flat and remove the entire backing. We also have the option to purchase the Premium Resurfacing Kit if you'd like. whiteboard Start from the middle and push up, and then return to the middle and push down. Then move the cloths around in the water to loosen up the dirt and grime, rinse the cloths thoroughly, and let them air dry or dry them on the cold or lowest possible heat setting on your automatic dryer. Spray your old whiteboard down with plenty of water before you stick the Think Board onto the original surface. Theyre also eco-friendly and virtually odor-free, and can quickly clean off low-odor varieties of ink from an intact whiteboard coated surface.
  The squeegee will help make sure that everything lays flat as you are cutting. I found this to be very informative; I had never thought of using WD-40! It is nothing that makes the board unusable, but it should be noted. If you have regular paint, and you're thinking about whiteboard paint consider the cost of paint + cost of a professional install + 7 days of waiting time before you can use the wall + the harmful VOCs that are offgasing from the paint. And what we found is. it depends on the teacher. Normally we do a 12-inch horizontal stroke from the center, pushing left, and then overlapping horizontal strokes up to the top, and then overlapping strokes to the bottom. Most kidney tables we see are about 4'x6'. On horizontal surfaces, we estimate they'll last 1-2 years. wikiHow's Content Management Team carefully monitors the work from our editorial staff to ensure that each article is backed by trusted research and meets our high quality standards. Yes, you can use any brand of dry-erase markers on a Quartet magnetic glass board. ideapaint erase Most of the time, we try to align the top edge of the Think Board just below the metal/wood edge. Keep wiping down the board with your clean towel until it no longer picks up dirt and dust.
  By signing up you are agreeing to receive emails according to our privacy policy. What that means, is that gas is literally coming out of your walls for a few weeks after you paint. Its best to again go from top to bottom, scrubbing with a circular action. It may be possible to sand out the scratches using a very fine-grit sandpaper, then repaint using white dry-erase board paint; or ;buy a dry-erase "film" sheet that would fit over the existing board. Also, never use abrasive pads or scrubbers on your whiteboard painted surface, as doing so can also strip the sheen from the surface and make markings difficult to erase completely. We normally place the sticker in the bottom left or bottom right corner of the board. whiteboard There when you need it. Save time, money and headaches by choosing the best whiteboard paint on the market ReMARKable! We have a team of experts standing by. The cleaner the board, the better the Think Board will look :). The boards in this. Watch our video (even if you watch it in 2x speed) to see our technique! See more info at the bottom of the page for instructions on wet installing over a whiteboard or a chalkboard. {"smallUrl":"https:\/\/www.wikihow.com\/images\/thumb\/0\/03\/Restore-a-Whiteboard-Step-1-Version-3.jpg\/v4-460px-Restore-a-Whiteboard-Step-1-Version-3.jpg","bigUrl":"\/images\/thumb\/0\/03\/Restore-a-Whiteboard-Step-1-Version-3.jpg\/aid257537-v4-728px-Restore-a-Whiteboard-Step-1-Version-3.jpg","smallWidth":460,"smallHeight":345,"bigWidth":728,"bigHeight":546,"licensing":"
License: Creative Commons<\/a> License: Creative Commons<\/a> License: Creative Commons<\/a> License: Creative Commons<\/a> License: Creative Commons<\/a> License: Creative Commons<\/a> License: Creative Commons<\/a> License: Creative Commons<\/a> License: Creative Commons<\/a> License: Creative Commons<\/a> License: Creative Commons<\/a> License: Creative Commons<\/a> License: Creative Commons<\/a>
\n<\/p>
\n<\/p><\/div>"}, {"smallUrl":"https:\/\/www.wikihow.com\/images\/thumb\/c\/c9\/Restore-a-Whiteboard-Step-2-Version-3.jpg\/v4-460px-Restore-a-Whiteboard-Step-2-Version-3.jpg","bigUrl":"\/images\/thumb\/c\/c9\/Restore-a-Whiteboard-Step-2-Version-3.jpg\/aid257537-v4-728px-Restore-a-Whiteboard-Step-2-Version-3.jpg","smallWidth":460,"smallHeight":345,"bigWidth":728,"bigHeight":546,"licensing":"
\n<\/p>
\n<\/p><\/div>"}, {"smallUrl":"https:\/\/www.wikihow.com\/images\/thumb\/d\/df\/Restore-a-Whiteboard-Step-3-Version-3.jpg\/v4-460px-Restore-a-Whiteboard-Step-3-Version-3.jpg","bigUrl":"\/images\/thumb\/d\/df\/Restore-a-Whiteboard-Step-3-Version-3.jpg\/aid257537-v4-728px-Restore-a-Whiteboard-Step-3-Version-3.jpg","smallWidth":460,"smallHeight":345,"bigWidth":728,"bigHeight":546,"licensing":"
\n<\/p>
\n<\/p><\/div>"}, {"smallUrl":"https:\/\/www.wikihow.com\/images\/thumb\/8\/8d\/Restore-a-Whiteboard-Step-4-Version-3.jpg\/v4-460px-Restore-a-Whiteboard-Step-4-Version-3.jpg","bigUrl":"\/images\/thumb\/8\/8d\/Restore-a-Whiteboard-Step-4-Version-3.jpg\/aid257537-v4-728px-Restore-a-Whiteboard-Step-4-Version-3.jpg","smallWidth":460,"smallHeight":345,"bigWidth":728,"bigHeight":546,"licensing":"
\n<\/p>
\n<\/p><\/div>"}, {"smallUrl":"https:\/\/www.wikihow.com\/images\/thumb\/d\/df\/Restore-a-Whiteboard-Step-5-Version-3.jpg\/v4-460px-Restore-a-Whiteboard-Step-5-Version-3.jpg","bigUrl":"\/images\/thumb\/d\/df\/Restore-a-Whiteboard-Step-5-Version-3.jpg\/aid257537-v4-728px-Restore-a-Whiteboard-Step-5-Version-3.jpg","smallWidth":460,"smallHeight":345,"bigWidth":728,"bigHeight":546,"licensing":"
\n<\/p>
\n<\/p><\/div>"}, {"smallUrl":"https:\/\/www.wikihow.com\/images\/thumb\/3\/3b\/Restore-a-Whiteboard-Step-6-Version-2.jpg\/v4-460px-Restore-a-Whiteboard-Step-6-Version-2.jpg","bigUrl":"\/images\/thumb\/3\/3b\/Restore-a-Whiteboard-Step-6-Version-2.jpg\/aid257537-v4-728px-Restore-a-Whiteboard-Step-6-Version-2.jpg","smallWidth":460,"smallHeight":345,"bigWidth":728,"bigHeight":546,"licensing":"
\n<\/p>
\n<\/p><\/div>"}, {"smallUrl":"https:\/\/www.wikihow.com\/images\/thumb\/f\/f6\/Restore-a-Whiteboard-Step-7.jpg\/v4-460px-Restore-a-Whiteboard-Step-7.jpg","bigUrl":"\/images\/thumb\/f\/f6\/Restore-a-Whiteboard-Step-7.jpg\/aid257537-v4-728px-Restore-a-Whiteboard-Step-7.jpg","smallWidth":460,"smallHeight":345,"bigWidth":728,"bigHeight":546,"licensing":"
\n<\/p>
\n<\/p><\/div>"}, {"smallUrl":"https:\/\/www.wikihow.com\/images\/thumb\/3\/3b\/Restore-a-Whiteboard-Step-8.jpg\/v4-460px-Restore-a-Whiteboard-Step-8.jpg","bigUrl":"\/images\/thumb\/3\/3b\/Restore-a-Whiteboard-Step-8.jpg\/aid257537-v4-728px-Restore-a-Whiteboard-Step-8.jpg","smallWidth":460,"smallHeight":345,"bigWidth":728,"bigHeight":546,"licensing":"
\n<\/p>
\n<\/p><\/div>"}, {"smallUrl":"https:\/\/www.wikihow.com\/images\/thumb\/3\/38\/Restore-a-Whiteboard-Step-9.jpg\/v4-460px-Restore-a-Whiteboard-Step-9.jpg","bigUrl":"\/images\/thumb\/3\/38\/Restore-a-Whiteboard-Step-9.jpg\/aid257537-v4-728px-Restore-a-Whiteboard-Step-9.jpg","smallWidth":460,"smallHeight":345,"bigWidth":728,"bigHeight":546,"licensing":"
\n<\/p>
\n<\/p><\/div>"}, {"smallUrl":"https:\/\/www.wikihow.com\/images\/thumb\/3\/3c\/Restore-a-Whiteboard-Step-10.jpg\/v4-460px-Restore-a-Whiteboard-Step-10.jpg","bigUrl":"\/images\/thumb\/3\/3c\/Restore-a-Whiteboard-Step-10.jpg\/aid257537-v4-728px-Restore-a-Whiteboard-Step-10.jpg","smallWidth":460,"smallHeight":345,"bigWidth":728,"bigHeight":546,"licensing":"
\n<\/p>
\n<\/p><\/div>"}, {"smallUrl":"https:\/\/www.wikihow.com\/images\/thumb\/d\/d6\/Restore-a-Whiteboard-Step-11.jpg\/v4-460px-Restore-a-Whiteboard-Step-11.jpg","bigUrl":"\/images\/thumb\/d\/d6\/Restore-a-Whiteboard-Step-11.jpg\/aid257537-v4-728px-Restore-a-Whiteboard-Step-11.jpg","smallWidth":460,"smallHeight":345,"bigWidth":728,"bigHeight":546,"licensing":"
\n<\/p>
\n<\/p><\/div>"}, {"smallUrl":"https:\/\/www.wikihow.com\/images\/thumb\/d\/d4\/Restore-a-Whiteboard-Step-12.jpg\/v4-460px-Restore-a-Whiteboard-Step-12.jpg","bigUrl":"\/images\/thumb\/d\/d4\/Restore-a-Whiteboard-Step-12.jpg\/aid257537-v4-728px-Restore-a-Whiteboard-Step-12.jpg","smallWidth":460,"smallHeight":345,"bigWidth":728,"bigHeight":546,"licensing":"
\n<\/p>
\n<\/p><\/div>"}, {"smallUrl":"https:\/\/www.wikihow.com\/images\/thumb\/1\/1b\/Restore-a-Whiteboard-Step-13.jpg\/v4-460px-Restore-a-Whiteboard-Step-13.jpg","bigUrl":"\/images\/thumb\/1\/1b\/Restore-a-Whiteboard-Step-13.jpg\/aid257537-v4-728px-Restore-a-Whiteboard-Step-13.jpg","smallWidth":460,"smallHeight":345,"bigWidth":728,"bigHeight":546,"licensing":"
\n<\/p>
\n<\/p><\/div>"}.
Sitemap 1